Introduction
In this tutorial, we shall be spinning up a simple React and TypeScript project
that uses C# for the backend. In particular, we’ll be taking the default React
template that comes with .NET 6 and converting the project it produces into
TypeScript from JavaScript. The end result will be exactly the same as what is
produced from dotnet new react but with, well, TypeScript!
The source code for the completed version of this project can be found here.
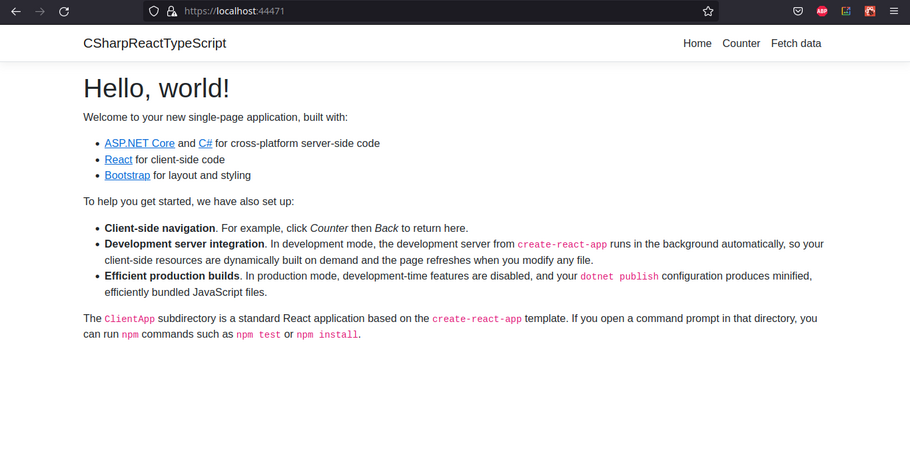
Preview of the final converted project.
Requirements
I will assume you already are familiar with C#, React, JavaScript, and a little bit of TypeScript too. We’ll also be using .NET 6 (installation instructions here) along with any text editor/IDE and command line tools you prefer.
Instructions
1. Create an Empty C# with React Project
To kick things off, we need to go ahead and create a new C# with React project. We can easily do this with the following command:
dotnet new react -o CSharpReactTypeScript
The above command creates a new .NET project based on the React template that
comes with .NET 6. The result is placed into the CSharpReactTypeScript
directory we created with -o (you can check out other templates you have
installed with dotnet new --list).
Go ahead and cd into the new CSharpReactTypeScript directory and run the
project with:
dotnet run
If all is well, your website is now up and running! Visit it at the IP the above
command spits out. In my case, it is https://localhost:7045. Yours will
likely be different!
After connecting, you’ll be greeted by a screen that says, “Launching the SPA proxy…”. Give it a moment and you’ll be greeted with the following:
Oh hey, it’s the same image from before!
At this point, the entire project is technically done. All that’s left is to get rid of the old JavaScript code and replace it with TypeScript.
2. Convert the React JavaScript to TypeScript
2.1. Foreword
Next, we shall begin converting the existing JavaScript code in the ClientApp
directory to TypeScript. Do note that, internally, the React template we used
actually makes use of the ever so familiar
create-react-app command to
generate ClientApp which houses all of our React frontend code.
I mention the above for you could try making a fresh React project with
TypeScript already bundled with it via a command like npx create-react-app
my-app --template typescript (more info
here).
Then you could hook it up to the C# code itself. However, I found this a bit
troublesome to do. Perhaps I missed something but I personally find it a lot
easier to just take our already functional ClientApp React application and
convert it to TypeScript manually. Let’s do this now.
2.2. Adding TypeScript
First things first, we need to add TypeScript to the React ClientApp project.
For reference, I am basing the following steps on the articles Adding
TypeScript and How to
Migrate a React App to
TypeScript.
Alright, let’s do this! cd into ClientApp and then add TypeScript to our
project with the following:
npm install --save typescript @types/node @types/react @types/react-dom @types/jest
With the above done, let’s go ahead an add in a tsconfig.json. Run the
following in ClientApp:
npx tsc --init
One minor change I ended up making to the tsconfig.json file is uncommenting
the line that reads:
// "jsx": "preserve",
to
"jsx": "preserve",
Otherwise, we’ll have some issues using .tsx files. If you wish to see what I
mean, try commenting the above out again after finishing the tutorial. You get a
bunch of errors like the following:
ERROR in src/components/Home.tsx:5:9

TS17004: Cannot use JSX unless the '--jsx' flag is provided.
    3 | const Home = () => {
    4 |     return (
  > 5 |         <div>
      |         ^^^^^
    6 |             <h1>Hello, world!</h1>
    7 |             <p>Welcome to your new single-page application, built with:</p>
    8 |             <ul>
Anyways, we now have TypeScript added to the project. However, we aren’t quite making use of it. Yet.
2.3. Migrating Components to TypeScript
Finally, let’s start making good use of TypeScript! In particular, we shall convert the old JavaScript based components that came with the React template to TypeScript based ones. To go a step further, I’ll even change said components into functional components but you can use classes if you’d like.
Before we begin, I will state that you don’t have to do any of this. You can go ahead and remove all of the old components and do your own thing. You can instead just glance at the source code and the following paragraphs to get the gist of what’s happening.
2.3.1. Home Component
Let’s start with one of the simpler components. cd into the
ClientApp/src/components/ directory and rename Home.js to Home.tsx. I
assume you are already familiar with JSX (JavaScript XML or JavaScript
Extensible Markup Language) and its TypeScript equivalent TSX.
Right off the bat, this is fine. Despite the change in the file extension, everything is still technically okay and we could even leave things be. However, I would like to adopt functional components and make more use of TypeScript in general so let’s do just that.
Feel free to take a crack at it yourself but here’s my code for Home.tsx:
import React from 'react';

const Home = () => {
    return (
        <div>
            <h1>Hello, world!</h1>
            <p>Welcome to your new single-page application, built with:</p>
            <ul>
                <li><a href='https://get.asp.net/'>ASP.NET Core</a> and <a href='https://msdn.microsoft.com/en-us/library/67ef8sbd.aspx'>C#</a> for cross-platform server-side code</li>
                <li><a href='https://facebook.github.io/react/'>React</a> for client-side code</li>
                <li><a href='http://getbootstrap.com/'>Bootstrap</a> for layout and styling</li>
            </ul>
            <p>To help you get started, we have also set up:</p>
            <ul>
                <li><strong>Client-side navigation</strong>. For example, click <em>Counter</em> then <em>Back</em> to return here.</li>
                <li><strong>Development server integration</strong>. In development mode, the development server from <code>create-react-app</code> runs in the background automatically, so your client-side resources are dynamically built on demand and the page refreshes when you modify any file.</li>
                <li><strong>Efficient production builds</strong>. In production mode, development-time features are disabled, and your <code>dotnet publish</code> configuration produces minified, efficiently bundled JavaScript files.</li>
            </ul>
            <p>The <code>ClientApp</code> subdirectory is a standard React application based on the <code>create-react-app</code> template. If you open a command prompt in that directory, you can run <code>npm</code> commands such as <code>npm test</code> or <code>npm install</code>.</p>
        </div>
    );
}

export { Home };
2.3.2. Counter Component
Next, let’s convert the Counter component. This one is slightly more complex than the Home component since it has actual state to it but still not so bad. Feel free to give it a go yourself.
Anyways, rename Counter.js to Counter.tsx. Notice that TypeScript doesn’t
quite like this change. In my case, I got a few errors such as:
ERROR in src/components/Counter.tsx:6:15

TS7006: Parameter 'props' implicitly has an 'any' type.
    4 |   static displayName = Counter.name;
    5 |
  > 6 |   constructor(props) {
      |               ^^^^^
    7 |     super(props);
    8 |     this.state = { currentCount: 0 };
    9 |     this.incrementCounter = this.incrementCounter.bind(this);
If you actually inspect the Counter.tsx code, you’ll notice that we don’t
actually need props. In fact, we only have a single piece of state called
currentCount and a callback method named incrementCounter(). Open up
Counter.tsx and copy the following code into it:
import React, { useState } from 'react';

const Counter = () => {
    const [currentCount, setCurrentCount] = useState<number>(0);
    const incrementCounter = () => setCurrentCount(currentCount + 1);

    return (
        <div>
            <h1>Counter</h1>

            <p>This is a simple example of a React component.</p>

            <p aria-live="polite">Current count: <strong>{currentCount}</strong></p>

            <button className="btn btn-primary" onClick={incrementCounter}>Increment</button>
        </div>
    );
}

export { Counter };
Nice! Now things are feeling a little more “TypeScript-y”! Well, the bit where we
use useState<number>(0) does at least. If you’re not used to functional
components or if something looks a bit weird, be sure to review React
Hooks a bit.
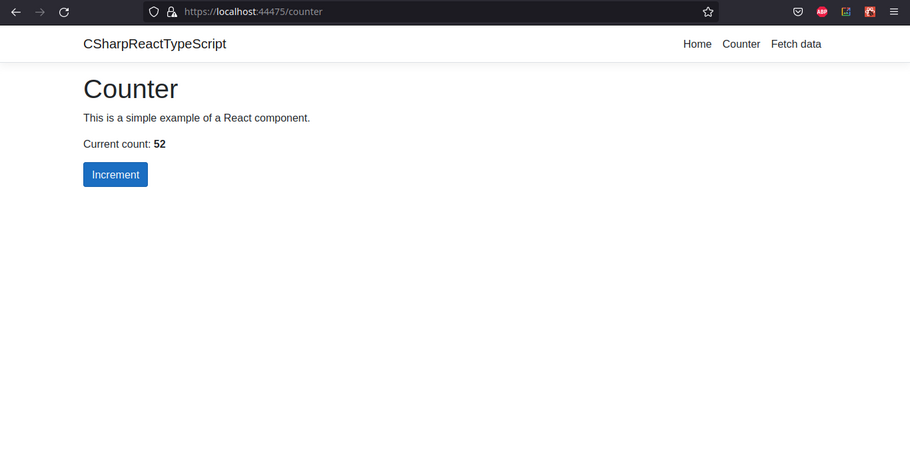
Counter.tsx now working in TypeScript!
2.3.3. NavMenu Component
Once again, let’s get a little more complex with this next component. That is, the NavMenu component.
As per usual, go ahead and rename NavMenu.js to NavMenu.tsx. As you might
expect, we have another error! However, even if you comment the existing
NavMenu class out and replace it with some plain old functional component like:
export const navMenu = () => <h1>Please work...</h1>;
It still won’t work! Well, that’s because of the line at the top of the
NavMenu.tsx file that reads:
import { Link } from 'react-router-dom';
If you comment the above out and use the “Please work…” version of the NavMenu then we won’t have any compilation errors. Of course, this isn’t ideal… So, what do we do?
First off, the default React project that we generated with dotnet new react
makes use of the React Router routing library. This
is a pretty useful library that enables us to, “build a single-page web
application with navigation without the page refreshing as the user navigates”
as per
this
article. You might have noticed how the URL changes as you would click around
the NavMenu (well, before we made those breaking changes). That’s React Router
at work for you.
Anyways, we need to add the TypeScript version of React Router to our project.
Run the following command inside of the ClientApp directory:
npm install @types/react-router-dom
And hurray! No more error! Of course, we’re not done yet. Let’s go ahead and convert NavMenu into a functional component. The process is very similar to that of the Counter. Try it yourself if you haven’t been! In either case, here is what I wrote:
import React, { useState } from 'react';
import { Collapse, Container, Navbar, NavbarBrand, NavbarToggler, NavItem, NavLink } from 'reactstrap';
import { Link } from 'react-router-dom';
import './NavMenu.css';

const NavMenu = () => {
    const [collapsed, setCollapsed] = useState<boolean>(true);
    const toggleNavbar = () => setCollapsed(!collapsed);

    return (
        <header>
            <Navbar className="navbar-expand-sm navbar-toggleable-sm ng-white border-bottom box-shadow mb-3" light>
                <Container>
                    <NavbarBrand tag={Link} to="/">CSharpReactTypeScript</NavbarBrand>
                    <NavbarToggler onClick={toggleNavbar} className="mr-2" />
                    <Collapse className="d-sm-inline-flex flex-sm-row-reverse" isOpen={!collapsed} navbar>
                        <ul className="navbar-nav flex-grow">
                            <NavItem>
                                <NavLink tag={Link} className="text-dark" to="/">Home</NavLink>
                            </NavItem>
                            <NavItem>
                                <NavLink tag={Link} className="text-dark" to="/counter">Counter</NavLink>
                            </NavItem>
                            <NavItem>
                                <NavLink tag={Link} className="text-dark" to="/fetch-data">Fetch data</NavLink>
                            </NavItem>
                        </ul>
                    </Collapse>
                </Container>
            </Navbar>
        </header>
    );
}

export { NavMenu };
Double check that everything is working by entering responsive design mode and seeing if you can toggle the hamburger menu button. If you haven’t done this before, open the inspector by right clicking in the browser and selecting the inspector button. Following this, click the smartphone looking icon in the top right as per the following screenshot:
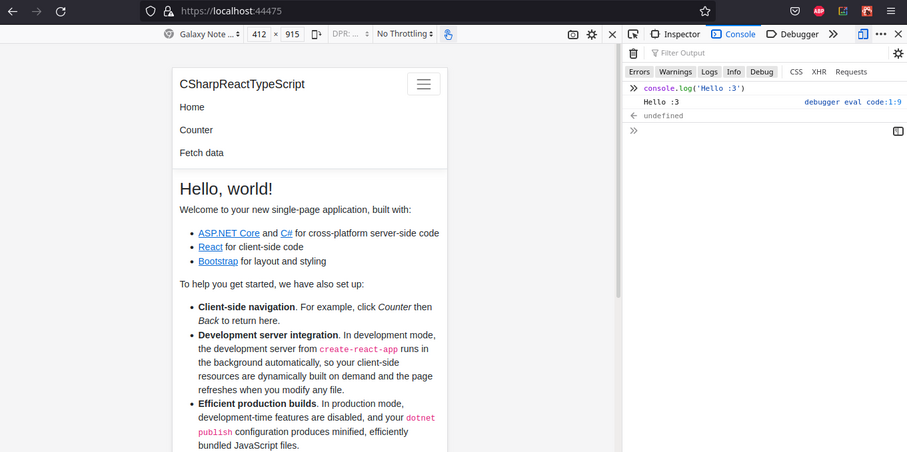
NavMenu workin’ great with the hamburger menu open!
Try clicking the burger! If you see the menu opening and closing then we’re set!
2.3.4. Layout Component
This next component isn’t too bad. We just need to make a functional component that has a children property to it. Let’s get started.
First off, rename Layout.js to Layout.tsx. And aw jeez it’s another error!
ERROR in src/components/Layout.tsx:13:23

TS2339: Property 'children' does not exist on type 'Readonly<{}>'.
    11 |         <NavMenu />
    12 |         <Container>
  > 13 |           {this.props.children}
       |                       ^^^^^^^^
    14 |         </Container>
    15 |       </div>
    16 |     );
As previously stated, the children prop is giving us some trouble here. Luckily,
the fix is rather easy. Just create an interface with a children property that
is of type React.ReactNode. My final version of Layout.tsx looks as follows:
import React from 'react';
import { Container } from 'reactstrap';
import { NavMenu } from './NavMenu';

interface Props {
  children?: React.ReactNode;
};

const Layout = ({ children }: Props) => {
    return (
        <div>
            <NavMenu />
            <Container>
                {children}
            </Container>
        </div>
    );
}

export { Layout };
2.3.5. FetchData Component
Finally, the last of the components! At least, in the
ClientApp/src/components/ directory… This is also what I would reckon to be
the most difficult yet most interesting of all of the components we’ve gone over
thus far! That is, for the FetchData component makes an API call to our own C#
backend server. I almost forgot C# was there waiting for us this whole time…
To begin, rename FetchData.js to FetchData.tsx. And alas, we have broken
everything. Again. But that’s cool! We got this.
I do recommend giving this one a go if you’re a bit rusty though! It’s a pretty good exercise albeit the API bits might be a little wonky. In either case, here is my solution:
import React, { useEffect, useState } from 'react';

interface Forecast {
    date: string;
    temperatureC: number;
    temperatureF: number;
    summary?: string;
};

const FetchData = () => {
    const [loading, setLoading] = useState<boolean>(true);
    const [forecasts, setForecasts] = useState<Forecast[]>([]);

    // Takes the place of componentDidMount()
    useEffect(() => {
        const populateWeatherData = async () => {
            const response = await fetch('weatherforecast');
            const data = await response.json();
            setForecasts(data);
            setLoading(false);
        }

        populateWeatherData()
    }, []);

    let contents = loading
        ? <p><em>Loading...</em></p>
        : renderForecastsTable(forecasts);

    return (
        <div>
            <h1 id="tabelLabel" >Weather forecast</h1>
            <p>This component demonstrates fetching data from the server.</p>
            {contents}
        </div>
    );
}

const renderForecastsTable = (forecasts: Forecast[]) => {
    return (
        <table className='table table-striped' aria-labelledby="tabelLabel">
            <thead>
                <tr>
                    <th>Date</th>
                    <th>Temp. (C)</th>
                    <th>Temp. (F)</th>
                    <th>Summary</th>
                </tr>
            </thead>
            <tbody>
                {forecasts.map(forecast =>
                    <tr key={forecast.date}>
                        <td>{forecast.date}</td>
                        <td>{forecast.temperatureC}</td>
                        <td>{forecast.temperatureF}</td>
                        <td>{forecast.summary}</td>
                    </tr>
                )}
            </tbody>
        </table>
    );
}

export { FetchData };
Well, that’s a bit more hefty than what we’re used to… First off, the C#
bits that were generated from dotnet new react has a very simple weather API
going. In the CSharpReactTypeScript directory, we have a WeatherForecast.cs
file with the following (in C# of course):
namespace CSharpReactTypeScript;

public class WeatherForecast
{
    public DateTime Date { get; set; }

    public int TemperatureC { get; set; }

    public int TemperatureF => 32 + (int)(TemperatureC / 0.5556);

    public string? Summary { get; set; }
}
That might look a bit similar to the Forecast interface from our
FetchData.tsx file. In fact, it’s modeled after it! This is needed for when we
use the fetch API to make a request to our server regarding weather forecast
data.
Moving forward, we have another file called WeatherForecastController.cs in
the CSharpReactTypeScript/Controllers/ directory. Opening this up, we have the
following:
using Microsoft.AspNetCore.Mvc;

namespace CSharpReactTypeScript.Controllers;

[ApiController]
[Route("[controller]")]
public class WeatherForecastController : ControllerBase
{
    private static readonly string[] Summaries = new[]
    {
        "Freezing", "Bracing", "Chilly", "Cool", "Mild", "Warm", "Balmy", "Hot", "Sweltering", "Scorching"
    };

    private readonly ILogger<WeatherForecastController> _logger;

    public WeatherForecastController(ILogger<WeatherForecastController> logger)
    {
        _logger = logger;
    }

    [HttpGet]
    public IEnumerable<WeatherForecast> Get()
    {
        return Enumerable.Range(1, 5).Select(index => new WeatherForecast
        {
            Date = DateTime.Now.AddDays(index),
            TemperatureC = Random.Shared.Next(-20, 55),
            Summary = Summaries[Random.Shared.Next(Summaries.Length)]
        })
        .ToArray();
    }
}
So then, whenever we make a request to our server for weather data at the
weatherforecast endpoint it will
invoke that Get() method which in turn randomly generates some information and
sends it back to our client (i.e., React).
Back in FetchData.tsx, we use the fetch API to get that weather data and have
it returned as JSON data that we then convert into our Forecast interface. This
is all done in the useEffect() hook which takes the place of our
componentDidMount() method from when FetchData was a class based component.
I hope that the rest of the FetchData.tsx file is self-explanatory.
Lastly, the following screenshot is what the FetchData component should roughly look like:
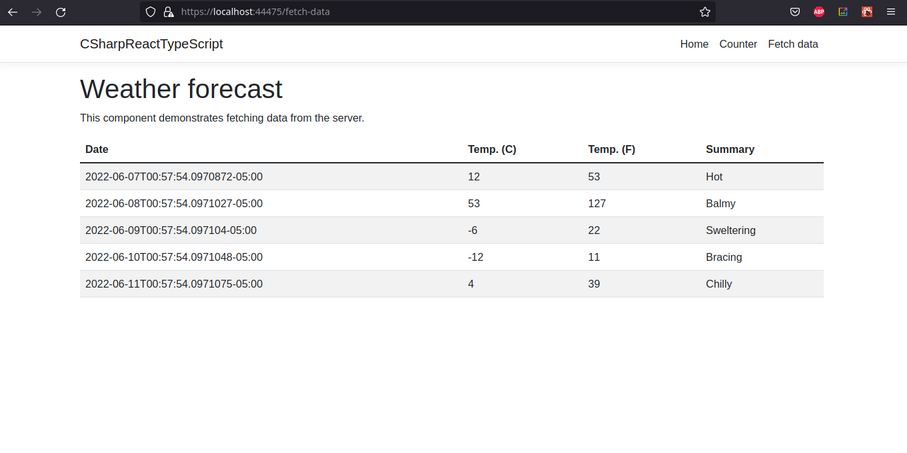
Weather forecast from our C# backend.
2.3.6. App Component
At this point, we might be going a bit overkill. We could technically stop as
the main components have been successfully converted to TypeScript. For the sake
of completeness, go into the ClientApp/src/ directory and rename App.js to
App.tsx. Then convert it into a functional component like so:
import React from 'react';
import { Route } from 'react-router';
import { Layout } from './components/Layout';
import { Home } from './components/Home';
import { FetchData } from './components/FetchData';
import { Counter } from './components/Counter';

import './custom.css'

const App = () => {
    return (
      <Layout>
        <Route exact path='/' component={Home} />
        <Route path='/counter' component={Counter} />
        <Route path='/fetch-data' component={FetchData} />
      </Layout>
    );
}

export default App;
2.4. Converting the Remaining JavaScript Files
At this point, we pretty much have our project where we want it to be. All of
the components have been successfully converted to .tsx files. As for the
remaining .js files, we can leave them be. If you want, you can totally
convert them to .ts files but I’d reckon to say that isn’t necessary. At
least, for now.
Likewise, I just tried to convert the remaining .js files to .ts or .tsx
and found it to be more trouble than it’s worth. If you’re feeling brave though,
this
article might be a bit useful. I had many a, “could not find a declaration file
for module” errors among other things that the linked article could help with.
In either case, congrats! You made it to the end!
And We’re Done!
Congratulations! You have successfully started using C# with React and TypeScript! The world is your oyster! Hurray! Huzzah! Way to go! Nice.
To summarize, all we needed to do was spin up a react application with dotnet
new react and then add TypeScript to it. From there, you can convert the
preexisting components that came with the template to TypeScript or just delete
them all and do your own thing.
Finally, here is the source code for the completed project in case you need it.
I hope this tutorial was helpful to you and good luck on your stuff!